My faveflavour

Wednesday, 30 October 2013

Chicken Pop Pie

Today I had a very nice lunch! Yesterday we prepared the dough because it has to rest about one hour to develop the right amount of gluten. After making sure that the shortening is soft enough by forcing the flat side trough it. That worked really good so we could be sure that it is soft enough. We sifted the flour and cut the shortening into small cubes so we do not have to handle it too much, and cut it in with a pastry blender. You can also use two knifes or a fork for that. After that we sprinkled one tablespoon water at a time over the mixture and stirred it carefully with a fork until the liquid was absorbed. Make sure not to add to much water, the amount of water can vary because of the humidity! Then we formed the dough into a ball and kneaded it just about five times. Over handling can over develop the gluten so it is important not to handle it too much! Then we let it rest.

On the second day we made the filling of vegetables and chicken. I sauté the chicken in a little oil until it was golden brown. Then I put it aside and did the same with the prepared vegetables. I put them aside too and melted the margarine in the n that is still hot. After that I added the onions and sautéed them until golden brown. Then we added a little bit of flour, chicken broth and milk, and flour again to prevent lumps. As all of the flour, milk and chicken broth was added we let it boil for one minute. After boiling it was time to add the chicken and vegetables. There was just the spicing missing so we added salt, pepper and parsley.
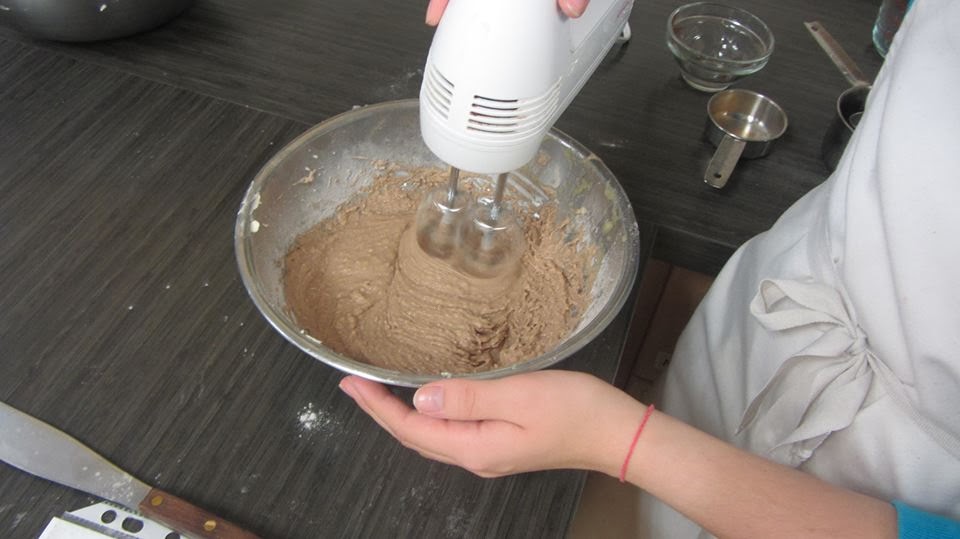
Next to it my partner prepared the dough and I have to say it was perfect.
We did a double crust pie so she cut out two circles, both about one and a half centimeter larger than the pan you use. After placing the dough in the pan and putting in the chicken mixture we just put the second dough on top and attached it to the other one. To prevent breaking of the lid we added vents by puncturing it with a knife.
You are free to make the vents in any pattern you like!
We baked the pie for exactly for twenty five minutes in a 475 F hot oven.
I really liked the combination of the neutral, salty pastry and intense flavoured chicken mixture. The onion adds a kind of sweetness which is really beneficial.
This is a easy recipe to prepare and you can have it for lunch or dinner.


Tuesday, 22 October 2013

Shortbread Pressed Cookies


Today we tried pressed cookies the first time. And it was even the first time for my baking class teacher. This recipe is really simple and you do not need any special ingredients. We prepared the dough and it first looked very crumbly but after a little kneading it turned out perfect. Then we rolled the dough into the shape of the cookie press and put it in. Before we chose a nice disc in form of a little star or flower. It was pretty hard to force the dough through the holes so O recommend to use a mechanic cookie press or a different dough. We had the problem that after we pressed the right amount of dough through the press, the cookie would not come off. But this problem is easy to solve with a knife. Just try to take off the cookie very gently. We get thirty two small stars or flowers out of that recipe. After twelve minutes they were golden brown on the edges and bottom and pretty soft. We let them cool down and I ate one. I have to say that they absorb all the liquid in your mouth in seconds. After each cookie I felt like I need to have some water! I measured the flour and I am pretty sure I did it in the right way and we never had this problem before. So I think it must be the recipe. To add a little more flavour I would, once again, put some chocolate on them. I love chocolate!


Monday, 21 October 2013

Healhy Cookie Challenge

The Healthy Cookie Challenge was really fun! We had to change a basic cookie recipe to make it more healthy. My group was really choosy so we planned to replace the half of margarine with yogurt to reduce the fat and using cherries instead of raisins for a better flavour. But fortunately my teacher could not get any cherries so we used frozen strawberries. I was so happy about that because I like strawberries even more than cherries! This Cookie will be a drop cookie.

The dough is made out of margarine, yogurt, sugar, brown sugar, an egg, vanilla, all purpose flour, whole wheat flour, baking soda, salt and rolled oats. We first mixed all the liquid ingredients and added the dry ingredients. We added the strawberries in the end so they did not loose their shape. To place them on the baking sheet we used two spoons. After 15 minutes we took out the cookies and let them cool down on a cooling rack so they did not keep on baking on the hot baking sheet and get dry. But I think in this case it would not have mattered because our cookies were so soft but already golden brown on the bottom. That was caused by the yogurt because it provides less structure than margarine. This challenge was also good to show how different ingredients have an effect on the cookies.
The yogurt took away the intense flavour of the strawberries, because we know that fat provides flavour and the yogurt we used was really low in fat.
The next time I would replace something else but not the fat. Maybe the sugar with honey.
I liked our cookies not that much because they were really soft and did not have a intensive flavor.


Sunday, 13 October 2013

Icebox Pinwheel Cookies

It took us two days to do the Icebox Pinwheel Cookies. The cookies are also called "Icebox Cookies" because you refrigerate them. The best thing about refrigerated cookies is that you can chill them in the fridge for a few days or even store them in the freezer and bake them for surprise visitors.
On the first day we made the dough for the cookies in the unit. After creaming the butter we added the sugar and kept on mixing until the mixture became fluffy. Before we added the liquid ingredients to the dry, we mixed them all together. We had to divide the dough in two because we paired up to do the next steps. So we divided our dough once again in two and added melted chocolate to one of them. After kneading the chocolate dough until the whole chocolate is spread evenly through the dough we formed them into a square and chilled them both in the fridge for twenty minutes. Then we rolled out the dough into five millimetres thick squares. We put the vanilla dough on top of the chocolate dough and pressed them gently together with the rolling pin. Make sure you cover the dough on both sides with parchment paper every time you use the pinwheel, to prevent the dough from sticking to anything! Then we started to roll the pinwheel so in the end it looks like a spiral. Take your time because it is a very important step and if you do a great job the cookies will look awesome! We wrapped the pinwheel roll in plastic wrap and stored it in the fridge for a whole day.

The next day we took out the vanilla-chocolate roll and cut it in twenty two wheels.Remember we used half of the dough! We preheated the oven to 350 Fahrenheit
(175 °C) and as soon as it was ready we put in the small wheels for fifteen minutes. The cookies are done when the bottom is golden brown, but not the top!

Our cookies looked really nice and tasted good but I wished to have a stronger chocolate flavour. So next time I will add more chocolate. Because I love chocolate I also plan to cover them with melted chocolate or add crushed chocolate chips.


Halloween Flood Cookies

It took us two days to finish these cookies but you can manage it to do them at the same day at home!
On the first day we made the dough by first creaming the butter and add the sugar. We added the egg and vanilla we mixed before and after that the combined dry ingredients. To prevent over mixing we used a wooden spoon to moisture the mixture. We rolled out the dough until it had a thickness of 4 millimetres. Then we cut out different shapes of Halloween figures with cookie cutters and put them all together on a baking sheet. Something with the baking time on the recipe must be wrong or something with our ovens because it took about 20 minutes to bake our cookies. Just make sure to have a look at them regularly after 7 minutes to prevent over baking. The cookies are ready when the bottom is golden brown!

We had to continue this lab on the next day because the cookies had to be cooled down before we could flood them. So when you try them at home let them cool and start with the flood icing.
The flood icing is made out of corn syrup, hot water and icing sugar. Before we could flood the cookies we had to make a border out of the same mixture so we added so much icing sugar that it stayed in its position. We put this icing all around the borders of every cookie to prevent the flood icing of flooding away, with the help of a piping bag. After that we added just a little bit of water to turn the border-mixture into flood icing. The great thing of flooding is that you can add any food colour you can think of to the flood icing. I fell in love with flooding cookies, it was just so much fun, looks great and is very easy. We used again a piping bag to put some of the flooding mixture on to the cookies and then used a toothpick to spread the flood icing all over the cookie to the border so there was no undone point anymore. Then it is your time to be creative and create the greatest cookie you have ever seen. Remember that the layer of flood icing should be dry when it is not supposed to mix with the next one.

Tip: To make stripes on your cookie use a toothpick and pull it slowly through your design.


Sunday, 6 October 2013

Applesauce Brownies

On Friday we divided the classroom in two areas. The groups on the one side baked Brook's Best Bombshell Brownies and on our side we did Applesauce Brownies. I greased the pan with shortening and did the cream made of sugar, margarine and half an egg. In this recipe we used applesauce to sweeten the batter. Then I mixed all the ingredients with an electric beater. This time we baked with all of our unit again so we were so many people for the few tasks but we managed it that everyone worked all the time and no one was just standing around doing nothing.
After exact 25 minutes the brownies were ready to eat and we divided them into twelve little pieces. The brownies of every unit were presented to the class and everyone was allowed to try one of the high fat and sugar brownies, the brook's Best Bombshell Brownies, and one of the low fat and sugar Brownies, the applesauce brownies. You can taste that in the Brook's Best Bombshell more than four times more sugar is used! And the name is the best you can imagine for them because the brownies are pretty chewy and the outside is just before getting crispy. They chocolate taste is very intensive. The Applesauce Brownies instead are really tender and the combination of apples and chocolate is very nice even though the taste of apples is really light. I think the Brook's Best Bombshell Brownies are the more classic one because I have not tried a variety of brownies before. The Applesauce Brownies are a good way to reduce the fat and sugar amount so they are more healthy. I really can recommend both of them!


Pizza Style Scone With Caramelized Onions

I did this recipe at home because I missed the class on Wednesday. I was really excited to caramelise the onions because my mother once told me that it can be really tough. The difficulty is to let the sugar or other ingredients melt but not burn.
I started cutting the onions, peppers, pepperoni and grating the Parmesan. Then I melted the margarine in a small pan and added the sugar. I stopped stirring when the sugar was mixed with the margarine. Then I added the onions and let the cook with a lid until the mass was tender. After that I mixed the tomato sauce.
For the dough I combined flour, baking powder and salt and made a well in the centre. In there I put in all liquid ingredients I mixed before. Then I first used a fork to moisten the dry ingredients and continued using my hands to make a ball out of the dough. The dough must be kneaded until everything is mixed and the dough is soft and well to form. I formed a 6-inch circle and put it into the oven for 5 minutes. After that I added the topping in this order. First the tomato sauce, caramelised onions, pepperoni, pepper, Parmesan and then then mozzarella.
It turned out to be one of my new favourite food. It is a pretty fast recipe and you do not have to spend as much time as on a real pizza! The caramelised onions are the perfect extra and I think it is a great idea to add them on to your next pizza.